

Using the Magnetic Lasso Tool to Select
There are several selection tools that you can use in Photoshop. The Magnetic Lasso Tool creates selections, automatically clinging to edges of contrast objects in the image. In this tutorial, we learn how to select specific object in the image using the magnetic lasso tool and refine edge.
Step 1:
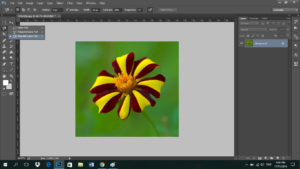
I will be using an image of a flower I got in the internet. Select the Magnetic Lasso in the toolbox to start the with the selection. See photo above.
Step 2:
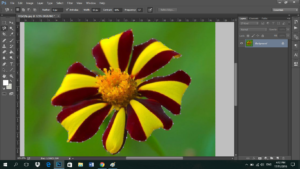
Click on the part of the image to set the anchor point. Draw with magnetic lasso to outline the object that you wanted to select. This tool will automatically creates fastening point or anchor clinging to the edge of the object.
Step 3:
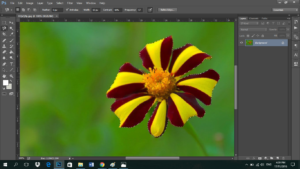
You have to locate the first anchor to close the contour or you can simply double-click or press enter to close the contour anytime and any point.
Step 4:

Before moving or duplicating the selection, we will use refine edge to have a smooth edges. Right click in the selection and then choose Refine Edge.
Step 5:
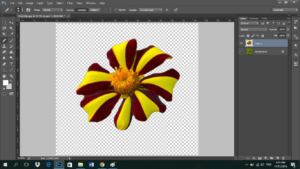
Finally, you can duplicate the selection or drag it to another document. If you want to duplicate the selection, just press Ctrl + J to have a copy of the selected area as a new layer.